Top 4 Ways To Manage Picture Sizes for WordPress
 A little background on picture sizes for WordPress
WordPress has default image sizes that it sets whenever you load a new picture into the Media Library. These sizes are called ‘Thumbnail‘, ‘Medium‘, and ‘Large‘, and they usually have associated dimensions with them. You may have seen these designations when you add a media to a post. Picture sizes for WordPress have the default MAX-dimensions of 150×150, 300×300, and 1024×1024 respectively.
Some pre-developed or custom created themes may have either changed these defaults or added additional size names and dimensions to be used. For example, Twenty Fourteen adds two: a 1038×576 for full-width features, and a 672×372 for posts. There really isn’t a limit to the number of additional image sizes a theme can use, but typically you’ll only need three or four different sizes for your site functionality.
Regardless of built-in WordPress or theme picture size options, you can change those sizes in Settings/Media to be whatever sizes you’d like them to be. Just remember that a particular theme may have been designed to use WordPress or their own sizing defaults, so be ready to change them back after every theme update unless your web developer has created a custom theme for your site or is using a child theme.
Back to the problem of how images display in WordPress
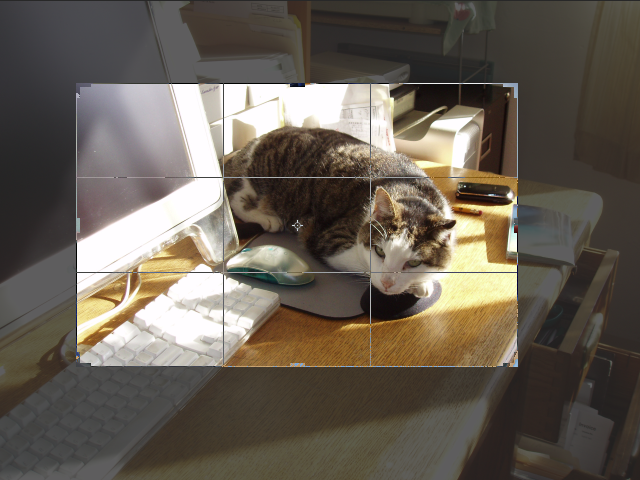
Imagine that the theme is set to use the thumbnail 150px by 150px (small square) size for it’s blog listing page. Now the photo I want to use is of my family, and it measures 1500px by 150px (large but short and wide).

In a default WordPress import to the Media Library, it resizes it (thankfully keeping the aspect so the photo doesn’t become all stretched and goofy) down to a max of 150px for the small thumbnail which effectively makes it 150px by 15px. Relatively speaking, still short and wide.
When the theme tries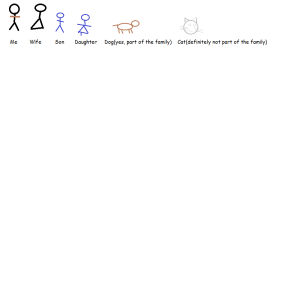 to put that in the space allocated for the 150px by 150px thumbnail, there is a 135 pixel discrepancy that may get filled with a background color (in this case it’s white) or background image. In another case (a different theme), the same picture is actually cropped — keeping just the center of the image — to 150px by 150px which cuts out most of the people in the photo.
Top 4 Ways To Manage Picture Sizes for WordPress
1) Size and optimize the photos you want to use yourself.
Photoshop (or GIMP or Paint or …) is your best friend. If you know your theme is wanting a mostly square picture, go in and do your own photo editing to get it close to square. It’s much more likely you will be able to make a better decision than WordPress about who gets left out of the photo (I choose the cat) or how much extra space gets left. Make sure to keep the image resolution higher than will be needed.
2) Create customized picture sizes for your WordPress site.
Add (or have your developer add) to your theme’s size choices to give you additional size options to select when you upload your pictures to the Media Library. (Remember: If your site uses a pre-developed WordPress theme instead of a custom theme developed just for you, this is best done by creating a “child” theme so your picture size customizations don’t get overwritten when you update your site’s theme.) Using the add_image_size function you can add as many different “sizes” as you would like. The function has easy parameters: name (can’t use thumb, medium, or large), width, height, and crop. The crop parameter determines if the image will just be cut off, or reduced keeping the same aspect ratio. David Coleman has a great explanation of thumbnail cropping on his website.
3) Edit the CSS (Cascading Style Sheet) for your WordPress site.
By editing the CSS, you can change the size of the displayed image, get rid of the funky backgrounds, and make many other customizations to design styles. In many WordPress themes, this can easily be done in your Theme Option Settings, or Appearance/Editor. Again, technically, you can just edit the theme CSS, but those changes will just get overwritten at the next theme update, so creating a child theme to host your CSS edits is recommended, rather than simply editing your primary theme’s CSS.
4) Install a WordPress Plugin to manage picture sizes for you.
Another important note regarding picture sizes for WordPress is that once a picture has been imported into the Media Library, it won’t ever change size. If you try to enlarge the image in your page or post after you’ve imported it, you’ll see that the image becomes fuzzy or pixilated. If you find that you need a different image size than originally uploaded you will want to instead delete it and re-upload your file. To avoid having to crop and optimize images yourself, or having to pay your web developer to customize your theme settings, you can simply install a plugin that will override your theme sizes directly on the media option page and regenerate all the sizes for images already uploaded for you. An excellent one is Simple Image Sizes, but there are many to choose from and you’ll want to determine the best plugin for compatibility with your particular site theme.
Note: No actual cats were harmed in the cropping of family images.